How to Install a Patio Awning Step by Step: A Complete Guide for
Autor: Laura Jorge
7 Minute(s) to read / 24.6.2026
How to install a patio awning is an increasingly common question for homeowners who want to make better use of their outdoor spaces. Terraces, patios, rooftop lounges, and garden areas are no longer occasional-use spaces, they have become essential extensions of the home.
A well-installed patio awning provides shade, UV protection, and greater comfort, while also improving the design and functionality of the outdoor area. It can transform an exposed terrace or patio into a more elegant, practical, and enjoyable space.
Whether you own a contemporary villa, a penthouse, or a family home, understanding how to install a patio awning correctly is essential for achieving durability, safety, and a professional finish.
In this complete guide, we’ll walk you through how to install a patio awning step by step, while also exploring useful design and outdoor living tips for creating a more comfortable exterior space.
Why Patio Awnings Are Essential
Patio awnings are no longer simply practical additions. They have become architectural design elements that improve both lifestyle and property value, creating shaded, comfortable, and elegant outdoor spaces.
At Arte del Lusso, this approach is reflected through bespoke awning and outdoor shading solutions designed to combine comfort, sun protection, and refined aesthetics in every project.
A high-quality awning can:
- Reduce heat and direct sun exposure
- Improve energy efficiency indoors
- Protect outdoor furniture
- Create comfortable dining and lounge areas
- Enhance the visual appearance of the terrace
- Extend outdoor living throughout the year
With outdoor entertaining becoming increasingly central to Mediterranean lifestyles, shaded terraces are now considered a must-have feature in modern Costa del Sol properties.
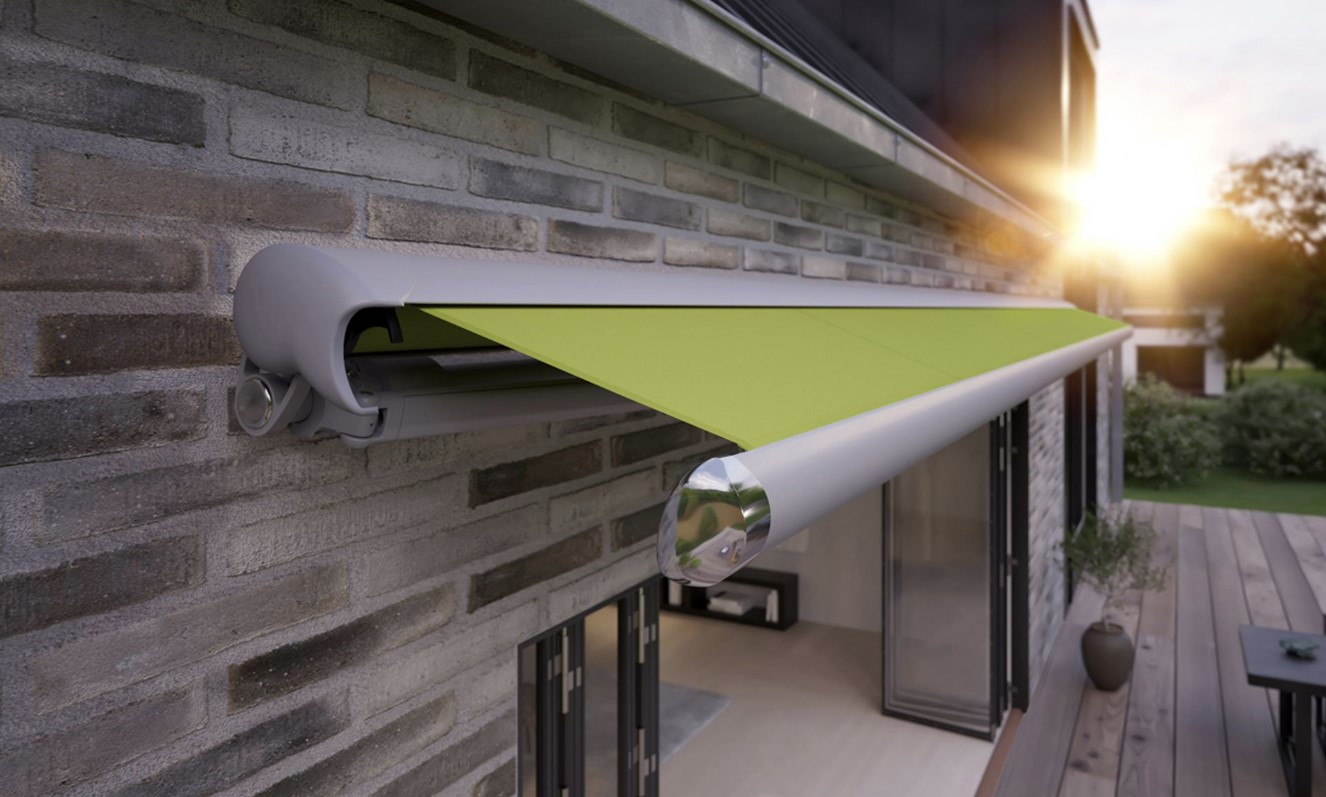
Step 1: Choose the Right Type of Patio Awning
Before installation begins, it’s important to choose the right awning system for your space.
The most popular awning styles include:
Retractable Awnings
Ideal for:
- Modern villas
- Apartments with terraces
- Flexible shade control
These systems can be extended or retracted depending on sunlight and weather conditions.
Pergola-Style Awnings
Perfect for:
- Large outdoor dining areas
- Luxury gardens
- Contemporary architecture
Pergolas provide a more permanent architectural appearance while still offering adjustable shading solutions.
Cassette Awnings
These systems protect the fabric and mechanism inside a closed cassette when retracted.
Benefits include:
- Longer lifespan
- Cleaner appearance
- Better protection from coastal conditions
Cassette awnings are especially popular in beachfront properties across Marbella and Puerto Banús.
Step 2: Measure the Installation Area Carefully
Accurate measurements are crucial before purchasing or installing an awning.
You’ll need to measure:
- Width of the patio or terrace
- Desired projection (how far the awning extends)
- Mounting height
- Clearance for doors and windows
In Marbella homes, it’s also important to consider the angle of the sun during peak summer months. Proper positioning can significantly improve comfort throughout the day.
Important Tip
Leave enough clearance for:
- Outdoor furniture
- Lighting fixtures
- Sliding doors
- Pergola structures or railings
Professional installers often recommend slightly larger coverage areas to maximize shade during afternoon sun exposure on the Costa del Sol.
Step 3: Select High-Quality Outdoor Fabric
The fabric is one of the most important components of any patio awning.
Materials that can withstand:
- Intense UV radiation
- Heat
- Humidity
- Salt air
- Wind exposure
For luxury outdoor spaces, premium acrylic fabrics remain the preferred option due to their durability, fade resistance, and elegant appearance.
Neutral Mediterranean-inspired colours continue to dominate current design trends, including:
- Warm white
- Sand
- Taupe
- Stone grey
- Olive tones
These colours blend beautifully with modern Andalusian architecture and natural outdoor materials.
Step 4: Gather the Necessary Tools
Before beginning installation, make sure you have the correct tools.
Common tools required include:
- Drill and masonry bits
- Spirit level
- Measuring tape
- Ladder or scaffolding
- Wrench set
- Screwdrivers
- Safety goggles
- Pencil or marker
Because awnings can be heavy, installation usually requires at least two people.
For larger systems or motorized awnings, professional installation is highly recommended.
Step 5: Mark the Bracket Positions
The mounting brackets support the entire awning structure, so proper positioning is essential.
How to Mark Correctly
- Measure equal distances from each side
- Use a spirit level to ensure perfect alignment
- Mark the drilling points carefully
- Double-check all measurements before drilling
Uneven brackets can cause the awning to operate incorrectly or place unnecessary strain on the mechanism.
Step 6: Drill the Mounting Holes
Once the bracket positions are marked:
- Drill the holes carefully into the wall
- Use appropriate anchors depending on the wall material
- Ensure all fixings are secure and stable
For concrete or masonry walls, heavy-duty fixings are usually required due to the weight of the awning and exposure to coastal winds.
Important Safety Consideration
Always verify that there are no hidden:
- Electrical cables
- Plumbing pipes
- Structural weaknesses
before drilling.
Step 7: Install the Brackets Securely
Attach the brackets firmly using the correct bolts and anchors.
The brackets must be able to support:
- The weight of the awning
- Wind pressure
- Repeated opening and closing movements
On the Costa del Sol, sudden wind gusts can occur even during summer months, making strong installation particularly important.
If the awning is motorized or large-scale, professional structural assessment may be necessary.
Step 8: Mount the Awning
Once the brackets are securely installed, the awning can be lifted into place.
This step often requires two or more people due to the weight and size of the system.
During Installation
- Carefully align the awning with the brackets
- Lock the mechanism securely into place
- Ensure all fixings are tightened correctly
Take your time during this stage to avoid damaging the fabric or frame.
Step 9: Adjust the Pitch and Angle
The pitch refers to the angle of the awning once extended.
This is especially important in Marbella because of the intensity and direction of the sun throughout the day.
Recommended Angle
Most patio awnings work best with a slight downward slope to:
- Improve shade coverage
- Allow rainwater runoff
- Reduce glare
The ideal angle depends on the orientation of your terrace and the desired amount of sun protection.
Step 10: Test the Mechanism
Once installed, fully extend and retract the awning several times to ensure smooth operation.
Check for:
- Proper alignment
- Smooth movement
- Fabric tension
- Stability
- Motor performance (if applicable)
If anything feels uneven or strained, adjustments should be made immediately.
Motorized Awnings and Smart Outdoor Living
One of the biggest outdoor living trends is the integration of smart technology into shading systems.
Luxury patio awnings increasingly include:
- Remote controls
- Smartphone integration
- Wind sensors
- Sun sensors
- Integrated LED lighting
- Home automation compatibility
Motorized awnings provide convenience while also protecting the system from sudden weather changes.
For modern villas on the Costa del Sol, smart shading systems have become almost standard.
Design Trends for Patio Awnings
Today’s patio awnings are designed to complement architecture rather than dominate it.
The biggest trends in Marbella include:
Minimalist Structures
Slim frames and clean lines create a more contemporary appearance.
Neutral Fabrics
Warm natural colours help outdoor spaces feel sophisticated and timeless.
Seamless Indoor-Outdoor Integration
Awnings are increasingly coordinated with:
Architectural Pergolas
Many luxury properties now combine retractable awnings with pergola systems for maximum flexibility and visual impact.
Maintenance Tips After Installation
Proper maintenance helps extend the lifespan of your patio awning.
To keep it looking beautiful:
- Clean the fabric regularly
- Retract during storms or high winds
- Avoid storing the fabric while wet
- Inspect brackets periodically
- Schedule occasional professional servicing
High-quality awnings installed correctly can last for many years, even in demanding coastal environments.
Should You Install a Patio Awning Yourself?
Smaller manual awnings can sometimes be installed as DIY projects if you have the correct tools and experience.
However, professional installation is usually recommended for:
- Large awnings
- Motorized systems
- Pergola structures
- Coastal properties exposed to strong winds
- Luxury architectural projects
Professional installers ensure proper alignment, safety, durability, and warranty compliance.
Final Thoughts
How to install a patio awning is one of the most useful questions for homeowners who want to enhance their outdoor living space. Beyond providing shade, a well-designed awning can transform terraces and patios into elegant, comfortable areas that can be enjoyed throughout the year.
Modern outdoor living continues to evolve toward more sophisticated, seamless, and technology-integrated environments. Patio awnings are no longer purely functional, they are key architectural and design features that contribute to comfort, aesthetics, and property value.
Whether you’re upgrading a terrace, designing a rooftop lounge, or creating a shaded dining area for family gatherings, investing in a high-quality awning and installing it correctly can elevate the entire outdoor experience.
The perfect patio awning creates the ideal balance between light, shade, comfort, and refined outdoor living.